


DIY: How to Create Your Own Custom Windows Software Installer | prediksi hk keluar malam ini, winslot888, poker online bonus
Introduction
Creating a custom software installer for Windows can streamline your application distribution. This DIY guide will walk you through the steps to create your own installer.
Step 1: Choose Your Installer Software
Several tools can assist you in creating custom installers, such as Inno Setup and NSIS. Choose one that suits your needs best.
Step 2: Prepare Your Files
Gather all the files necessary for your application, including executables, DLLs, and documentation.
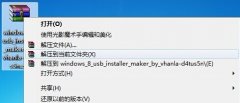
Step 3: Use the Installer Tool to Create the Installer
Using your chosen tool, follow the interface prompts to add your application files and configure the installation settings.
Step 4: Customize Your Installer
Personalize your installer by adding an application icon, setting installation paths, and creating shortcuts.
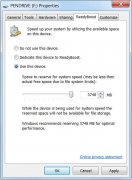
Step 5: Test Your Installer
Before distributing your installer, test it on a clean Windows environment to ensure it functions correctly.
Conclusion
By following these steps, you can create a custom Windows software installer tailored to your application needs, improving the user installation experience.
免责声明:All articles and pictures on this site are from user sharing and Internet collection. The copyright of articles and pictures belongs to the original author and original source. They are for learning and reference only. Please do not use them for commercial purposes. If your rights are damaged, please contact the website customer service.
Related articles
-

How to Update Your W
Learn how to effectively update your Windows system to improve performance and security. Step-by-step guide on managing updates seamlessly. Topics: me...
2026-06-29 -
Exploring the Best F
Discover the best free download software options for Windows users in 2023. Enhance your productivity and creativity without spending a dime. Topics: ...
2026-06-29 -
Step-by-Step Guide t
Follow this step-by-step guide to install apps seamlessly on Windows 11. Ensure a smooth installation process with our expert tips. Topics: togel 4d s...
2026-06-29 -
Understanding Softwa
Explore the key reasons why keeping your software up to date is essential for maintaining a secure and efficient PC. Topics: m qqholic live, play poke...
2026-06-29 -
Beginner's Guide to
A comprehensive beginner‘s guide to safely downloading software on your Windows PC and avoiding potential threats. Topics: kingdom 537 slot, hk tangga...
2026-06-29

