


How to Use System Restore: A Comprehensive Guide for Windows Users
Introduction
System Restore is a valuable tool built into Windows that allows users to revert their PC settings to a previous state. This comprehensive guide will walk you through the process of using System Restore effectively.
What is System Restore?
System Restore creates restore points, which are snapshots of your system at a specific time. These points can be used to recover your system from issues caused by software changes.
1. Creating a Restore Point
Before making significant changes to your system, it is advisable to create a restore point:
- Type “Create a restore point” in the Windows search bar.
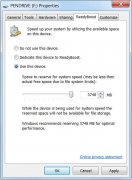
- Select your system drive and click “Configure.”
- Ensure System Protection is turned on.
- Click “Create” to set a restore point.
2. Accessing System Restore
If you encounter issues with your PC, you can access System Restore by:
- Searching for “System Restore” in the Windows search bar.
- Selecting “System Restore” from the results.
Using the Restore Wizard
The System Restore Wizard will guide you through selecting a restore point and confirming the restoration process.
3. Restoring Your System
Follow the prompts in the wizard to restore your system to a previous state. Your PC will restart, and the restoration will take place.
4. Troubleshooting Post-Restore Issues
After restoration, if you face issues, consider checking for recent updates or uninstalling problematic software.
Conclusion
System Restore is a powerful feature for Windows users, providing an easy way to fix system problems. By regularly creating restore points, you can ensure a smoother troubleshooting process in the future.
免责声明:All articles and pictures on this site are from user sharing and Internet collection. The copyright of articles and pictures belongs to the original author and original source. They are for learning and reference only. Please do not use them for commercial purposes. If your rights are damaged, please contact the website customer service.
Related articles
-

Maximizing Your PC's
Discover essential software tools to maximize your PC‘s performance. Learn how to install and utilize these tools to enhance your system
2026-08-10 -
Installing Software
Learn the ins and outs of software installation on Windows with our beginner-friendly guide
2026-08-10 -
How to Download Wind
Learn how to download Windows 10 and upgrade from earlier versions. Follow our step-by-step guide for a smooth transition
2026-08-10 -
Installing Essential
Explore essential tools to optimize your Windows system for better performance and productivity. Download and install today!
2026-08-10 -
Step-by-Step Guide t
Follow our step-by-step guide to install essential software on Windows 10. Make your system fully equipped and ready to use today!
2026-08-10