

Getting Started with Virtual Machines on Windows 10 | pinjaman online gampang cair, slot mania 89, live draw togel sgp hari ini
Getting Started with Virtual Machines on Windows 10
Virtual machines (VMs) allow you to run multiple operating systems on your Windows 10 PC. This guide will help you set up and use virtual machines effectively.
1. What is a Virtual Machine?
A virtual machine is a software-based emulation of a physical computer. It runs in isolation from your main operating system, allowing you to test software, run different OS versions, or create a segregated environment.
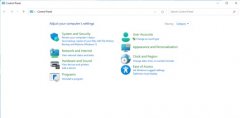
2. Installing Hyper-V
To create a VM, you'll need Hyper-V, a built-in virtualization feature in Windows 10 Pro and Enterprise. Enable it by going to Control Panel > Programs > Turn Windows features on or off and checking Hyper-V.
3. Create a New Virtual Machine
Open Hyper-V Manager and select New > Virtual Machine. Follow the wizard to configure the VM settings, including allocated memory and storage.
4. Installing an Operating System
After creating the VM, you will need to install an operating system. You can use a bootable ISO file or a physical installation media to load the OS onto the VM.
5. Running Your Virtual Machine
Once installed, you can start the VM from Hyper-V Manager. Use it just like a regular computer, while your main system remains unaffected.
Conclusion
Setting up virtual machines opens up a world of possibilities on your Windows 10 PC. Whether for testing or learning, VMs are a valuable tool for any tech enthusiast!
免责声明:All articles and pictures on this site are from user sharing and Internet collection. The copyright of articles and pictures belongs to the original author and original source. They are for learning and reference only. Please do not use them for commercial purposes. If your rights are damaged, please contact the website customer service.
Related articles
-

Getting Started with
Learn how to set up and use virtual machines on Windows 10. Discover the benefits and steps for creating a virtual environment. Topics: pinjaman onlin...
2026-07-04 -
Top 5 Essential Wind
Discover the top 5 essential system tools for Windows. Learn how to download and install these must-have apps to enhance your PC‘s performance. Topics...
2026-07-04 -
Exploring the Latest
Stay updated with the latest software updates and features for your Windows PC to enhance performance and security. Topics: demo slot pragmatic olympu...
2026-07-04 -
The Best Free Softwa
Explore the best free software available for Windows users. Enhance your PC experience without spending a dime! Topics: situs 4d slot, cara daftar id ...
2026-07-04 -
Mastering Windows Sy
Discover how to efficiently manage Windows system updates and download essential tools with our comprehensive tutorial. Topics: top1toto daftar, glory...
2026-07-04


