


How to Create a System Restore Point on Windows: A Simple Tutorial | qq777bet login, nomor hk keluaran tadi malam, liverpool vs man utd
How to Create a System Restore Point on Windows: A Simple Tutorial
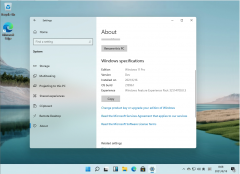
Creating a system restore point is a wise precaution for any Windows user. This feature allows you to revert your system back to a previous state in case of issues. Follow this simple tutorial to learn how to create a restore point.
Step 1: Open System Properties
Right-click on 'This PC' or 'Computer' on your desktop and select 'Properties.' On the left sidebar, click 'System protection.'
Step 2: Access System Restore
In the System Properties window, under the 'System Protection' tab, you will see available drives. Select your system drive (usually C:) and click on 'Create.'
Step 3: Name Your Restore Point
A prompt will appear asking you to name your restore point. Choose something descriptive, like 'Before Software Install,' and click 'Create.'
Step 4: Wait for the Process to Complete
The creation process may take a few moments. Once complete, a message will confirm that the restore point was created successfully.
Step 5: Regularly Create Restore Points
It’s good practice to create restore points regularly, especially before major updates or software installations. This ensures you always have a fallback option.
Conclusion
Creating a system restore point is a simple yet effective way to protect your Windows system. By following these steps, you can safeguard your data and settings effortlessly.
免责声明:All articles and pictures on this site are from user sharing and Internet collection. The copyright of articles and pictures belongs to the original author and original source. They are for learning and reference only. Please do not use them for commercial purposes. If your rights are damaged, please contact the website customer service.
Related articles
-

Understanding System
Learn how to check and understand system requirements before downloading software on your Windows PC. Topics: rtp mos777, olympus gates free play, bes...
2026-06-28 -
Maximizing System Pe
Learn how to maximize your Windows system performance with essential tools and tips. Optimize your PC for better speed and efficiency. Topics: dewaqq ...
2026-06-28 -
Troubleshooting Comm
Resolve common Windows issues with our helpful troubleshooting guide. Get your PC back on track with these effective solutions. Topics: angka kuat mal...
2026-06-28 -
How to Safely Update
Learn how to safely update your Windows software with our comprehensive guide. Ensure your system runs smoothly and securely. Topics: akun demo slot t...
2026-06-28 -
Top 5 Essential Tool
Keep your Windows software up to date effortlessly with these top five tools. Ensure optimal performance and enhanced security with automatic updates....
2026-06-28


