

Step-by-Step Guide to Installing Windows 11: Make the Transition Easy
Introduction
Upgrading to Windows 11 can seem daunting, but with our step-by-step guide, you'll find the transition smooth and hassle-free. Learn how to prepare, download, and install Windows 11 on your PC.
Step 1: Check System Requirements
Before downloading, ensure your PC meets the minimum system requirements for Windows 11. Key requirements include a compatible 64-bit processor, 4GB of RAM, and 64GB of storage. Use the PC Health Check app to verify compatibility.
Step 2: Backup Your Data
It's crucial to back up your files before making any system changes. Use external drives or cloud services to ensure your files are safe in case anything goes wrong during the installation.
Step 3: Download Windows 11
Visit the official Microsoft website to download Windows 11. Choose the appropriate version for your needs and download the installation tool. You can opt for an in-place upgrade or create a bootable USB drive for a clean installation.
Step 4: Create Installation Media (If Needed)
If you choose the clean installation route, you will need to create installation media. Follow the prompts in the Media Creation Tool to create a bootable USB drive that will allow you to install Windows 11 on your PC.
Step 5: Start the Installation Process
Insert your USB drive and restart your PC. Boot from the USB drive by selecting it in your BIOS settings. Follow the on-screen instructions to begin the installation process.
Step 6: Configure Your Settings
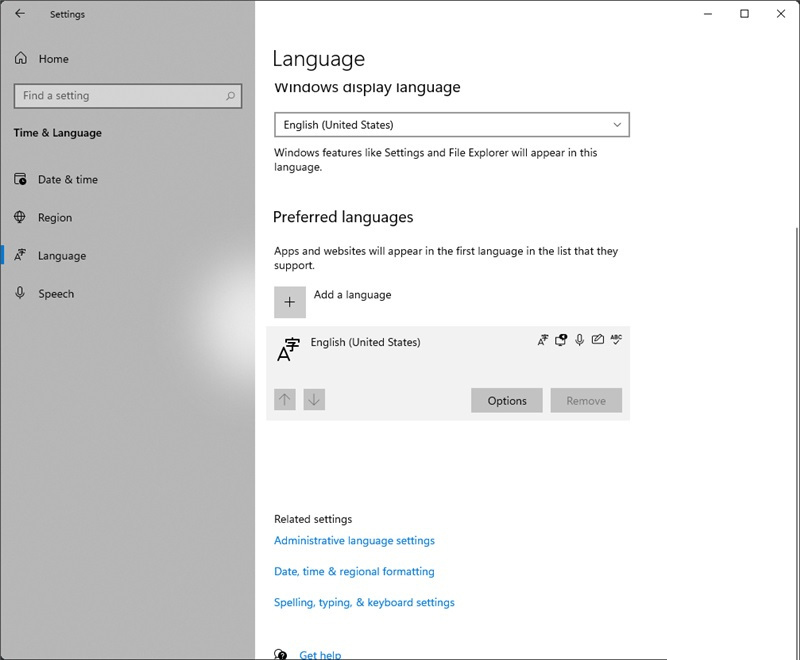
During the installation, you will be prompted to configure various settings such as language, time zone, and keyboard layout. Take your time to ensure everything is set according to your preferences.
Step 7: Complete the Installation
After configuring your settings, Windows 11 will install. This process may take some time, so be patient. Once completed, your PC will restart, and you can begin using your new operating system.
Conclusion
Installing Windows 11 doesn't have to be intimidating. By following this step-by-step guide, you can ensure a smooth transition to Microsoft's latest operating system. Remember to keep your Windows updated for the best performance.
免责声明:All articles and pictures on this site are from user sharing and Internet collection. The copyright of articles and pictures belongs to the original author and original source. They are for learning and reference only. Please do not use them for commercial purposes. If your rights are damaged, please contact the website customer service.
Related articles
-

Streamline Your Work
Discover the top 5 must-have applications for Windows that can streamline your workflow and enhance productivity. Download and install them today!
2026-09-01 -
How to Effectively D
Master the process of downloading and installing Windows updates with our comprehensive guide. Ensure your PC is always up-to-date
2026-09-01 -
Essential Tools for
Discover essential tools for Windows 10 users. Download and install the best applications for productivity and system management
2026-09-01 -
DIY Guide: Creating
Learn how to create a bootable USB drive for Windows installation with our DIY guide. Perfect for system installation and updates
2026-09-01 -
Essential Software T
Discover the must-have software tools to optimize your Windows system setup for efficiency and performance
2026-09-01