

Step-by-Step Tutorial: Installing Software Tools on Windows 11 | slot77bet, hasil pengeluaran hongkong hari ini 2020, profoto b10x, toto 99 slot, result zentogel
Introduction
Windows 11 introduces a fresh interface for managing software tools. Whether you are installing productivity apps, system utilities, or games, the process is user-friendly. This tutorial walks you through installing software on Windows 11 safely and efficiently.
Method 1: Using Microsoft Store
The Microsoft Store provides a curated collection of apps verified for Windows 11.
Steps:
- Open the Microsoft Store from the Start menu.
- Search for the desired app or tool.
- Click Get or Install to download and install.
- Launch the app from the Start menu.
Method 2: Installing from Downloaded Installers
For software unavailable in the store, install via downloadable installers.
Steps:
- Download the setup file from the official website.
- Right-click the file and select Run as administrator.
- Follow the on-screen installation wizard.
- Choose installation preferences, such as destination folder and additional options.
- Complete the installation and launch the software.
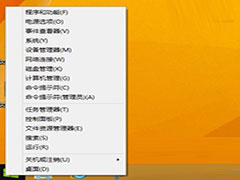
Managing Installed Apps
Access installed apps via Start menu or Settings > Apps > Installed apps. You can uninstall or modify apps here.
Updating Installed Software
Keep software updated through the Microsoft Store or by visiting the software’s official website for updates.
Conclusion
Installing software tools on Windows 11 is straightforward when following these steps. Choose the installation method best suited for your needs and ensure to download software from trusted sources.
免责声明:All articles and pictures on this site are from user sharing and Internet collection. The copyright of articles and pictures belongs to the original author and original source. They are for learning and reference only. Please do not use them for commercial purposes. If your rights are damaged, please contact the website customer service.
Related articles
-

Essential Tips for U
Discover essential tips for updating your software on Windows. Keep your applications secure and running smoothly with our expert advice. Topics: selo...
2026-07-05 -
Understanding Window
Gain a comprehensive understanding of Windows software licenses and what each type means for users and businesses. Topics: wd88 slot, situs slot baru,...
2026-07-05 -
Understanding Softwa
Explore the key factors affecting software compatibility on Windows systems and how to ensure smooth installations. Topics: new slot 888, demo gate ol...
2026-07-05 -
Step-by-Step: Instal
Learn how to install and use virtual machines on Windows with our comprehensive step-by-step guide. Topics: casino bonus, angka index togel, bos slot,...
2026-07-05 -
Exploring the Benefi
Discover how VPN software can enhance your online security and privacy while using your PC. Topics: slot dragon luck, slot cr7vip, domino deposit via ...
2026-07-05

