
Ultimate Guide to Installing Windows 11: Tips and Tools | inject id axis v3, sweet bonanza gacor, streaming virgin territory, hkbgoodluck88
Why Upgrade to Windows 11?
Windows 11 offers a host of new features and improvements over its predecessor, Windows 10. With a redesigned interface, better performance, and enhanced gaming capabilities, the upgrade is worth considering.
Before You Begin
Before diving into the installation, ensure your PC meets the minimum requirements for Windows 11. This includes a compatible 64-bit processor, 4GB of RAM, and at least 64GB of storage.
Tools and Software You Will Need
1. Windows 11 Installation Media
2. A USB drive with at least 8GB of space
3. Backup software to save your files
Step-by-Step Installation Process
Step 1: Back Up Your Files
Before you install Windows 11, back up all your important data to avoid any loss.
Step 2: Create Installation Media
Use the Windows Media Creation Tool to create a bootable USB drive. Follow the prompts to download the Windows 11 image and transfer it to your USB drive.
Step 3: Boot from USB
Restart your PC and enter the BIOS settings to change the boot order. Set your USB drive as the primary boot device.
Step 4: Start Installation
Follow the on-screen instructions to install Windows 11. Choose whether to upgrade or perform a clean installation.
Step 5: Finalize Setup
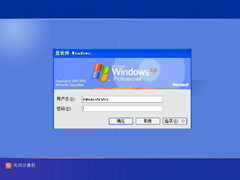
After installation, go through the setup process, including signing in with your Microsoft account, choosing your settings, and updating your drivers.
Post-Installation Tips
After installing Windows 11, make sure to check for updates and install necessary software for optimal performance.
免责声明:All articles and pictures on this site are from user sharing and Internet collection. The copyright of articles and pictures belongs to the original author and original source. They are for learning and reference only. Please do not use them for commercial purposes. If your rights are damaged, please contact the website customer service.
Related articles
-

Understanding Window
Learn how to manage and understand Windows updates. Ensure your system is always up-to-date with this comprehensive tutorial. Topics: hp 4d slot, bonu...
2026-06-29 -
Guide to Downloading
Learn how to download software safely with our guide that includes tips and best practices to avoid malware and scams. Topics: rumah303 slot, slotasia...
2026-06-29 -
Top 5 Must-Have Secu
Discover the top 5 security tools essential for protecting your Windows PC in 2023. Enhance your cybersecurity with these software solutions. Topics: ...
2026-06-29 -
The Future of Softwa
Learn how to safely install the latest applications on your Windows PC. Discover best practices for downloading software and ensuring security. Topics...
2026-06-29 -
Essential Tools for
Explore the essential tools for effective Windows system administration in 2023. Topics: mpo333, slot online 123, slot bri 24 jam.
2026-06-29

