

How to Install and Manage System Tools on Windows | hoki303 slot, vip 77 slot, funbola88 com, neng4d 4d, hoki rajaslot
Introduction
System tools are essential for maintaining and optimizing your Windows PC. This guide will walk you through the installation and management of these tools.
Step 1: Identify Necessary Tools
Determine which system tools you need based on your requirements, such as disk cleaning, performance monitoring, or backup solutions.
Step 2: Downloading the Tools
Download your chosen tools from official websites to ensure safety. Look for reputable software repositories if necessary.
Step 3: Installation Steps
Open the downloaded installation file and follow the prompts. Pay attention to any additional software offers and uncheck them if you don't want them.
Step 4: Configuring the Tools
After installation, open each tool and configure the settings according to your preferences for optimal performance.
Step 5: Keeping Tools Updated
Regularly check for updates to ensure your tools are functioning correctly and efficiently. Most tools will have an option to check for updates within their settings.
Step 6: Uninstalling Unused Tools
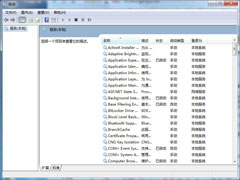
If you find certain tools are no longer needed, uninstall them to free up system resources. Go to 'Add or Remove Programs' in the Control Panel to manage your installed software.
Conclusion
Effectively installing and managing system tools can greatly enhance your Windows experience. Use the guidelines provided to optimize your system's performance!
免责声明:All articles and pictures on this site are from user sharing and Internet collection. The copyright of articles and pictures belongs to the original author and original source. They are for learning and reference only. Please do not use them for commercial purposes. If your rights are damaged, please contact the website customer service.
Related articles
-

How to Install the L
Learn how to easily install the latest Windows updates to keep your system secure and running smoothly. Topics: garrincha fifa 22, liga788 live, bonus...
2026-06-30 -
The Best Free and Pa
Explore the best free and paid applications available for Windows in 2023 to enhance your productivity and entertainment experience. Topics: 888 casin...
2026-06-30 -
Installing System To
Get a complete step-by-step guide to installing essential system tools on your Windows PC. Topics: day 4d, spbo4d, raja cuan69, bola bet 88.
2026-06-30 -
Top Software Downloa
Explore top software downloads designed to streamline your workflow and increase productivity. Topics: idn gacor 88 slot, rgo303, arsenal berita bola,...
2026-06-30 -
Top 5 Essential Syst
Discover the top five system tools you need to enhance your PC‘s performance and maintain its health. Topics: netent casino, rng slot, slots fortune f...
2026-06-30

